INSTRUCTIONS
This guide is here to help you get the most out of your watch from day one. Whether you're setting the time, adjusting your bracelet, or learning how to care for your new timepiece, we've got you covered. Follow the step-by-step instructions below to ensure a proper fit and smooth operation — and if you ever need further assistance, our local support team is here to help.

🕒 Setting the Time & Date – NH35 Movement
-
1. Unscrew the Crown
Gently turn the crown counter-clockwise until it pops out to the first position.
-
2. Set the Date: Pull the Crown to the First Click
Pull the crown one click out. This position adjusts the date (if your watch has a date display). Turn the crown counter-clockwise until the correct date appears.
-
3. Set the Time - Pull the Crown to the Second Click
Pull the crown out one more click (second position). Turn the crown clockwise to move the hands to the correct time.
-
4. Push the Crown Back In
Once you're done, gently push the crown all the way back in.
-
5. Screw Down the Crown
Press the crown in and turn to screw it down tightly. This ensures proper water resistance.
⏱️ Setting the Time & Using the Chronograph – Seiko VK63 Movement
Unscrew the Crown
Turn the crown until it pops out.
Pull the Crown Out to the Second Click
Gently pull the crown out to enter time-setting mode.
Set the Time
Turn the crown to set the hour and minute hands to the correct time.
Push the Crown In & Screw It Down
Push the crown back in and turn to screw it down securely, maintaining water resistance.
⏱️ Using the Chronograph (Stopwatch Function)
Start the Timer: Press the top-right button to start the chronograph.
Stop the Timer: Press the top-right button again to stop it.
Reset the Timerbottom-right button to reset the chronograph hands back to zero.
Note: The central second hand is the stopwatch hand — not the regular seconds display (which is shown on the sub-dial).

🔧 How to Adjust Your Bracelet - Screw-Down Links
-
(For Seikomariner & Seikojust Models)
All the tools you need to size your bracelet are included with your watch, so you can get the perfect fit at home — no trip to the jeweller needed.
-
🛠️ What You’ll Need (Included):
Small precision screwdriver
Bracelet holder block or soft cloth
🔩 Step by Step Instructions

Collapsible content
1. Prepare Your Watch
Lay your watch face down on a soft cloth or in the provided bracelet holder to avoid scratches.
2. Locate the Screws
Look at the side of the bracelet — you'll see small flat-head screws on each removable link (usually marked with small arrows underneath the band).
3. Unscrew the Links
Use the included screwdriver to carefully remove the screw from the link.
Unscrew one side at a time — you’ll need to remove the number of links needed to achieve the right fit (usually 1–2 from each side to keep it centered).
4. Reattach the Bracelet
Once links are removed, align the bracelet and screw it back together firmly.
Be gentle but ensure the screw is tight and secure.
5. Check the Fit
Try the watch on — if it's still loose or tight, repeat the process and adjust as needed.
📽️ How to Adjust a Split Pin Bracelet

Many of our models, such as the Nautiko or Santiko, use a split pin system for bracelet sizing. Here's how to safely adjust it using your included tools:
Collapsible content
Prep Your Workspace
Lay your microfibre cloth on a flat surface to prevent scratches and keep parts clean.
Identify the Split Pins
Look closely at the side of the bracelet links — one end of the pin will appear solid, and the other will have a visible split.
When removing pins, always press the pin from the solid end.
Removing the Links
- Place the bracelet into the press pin tool so that the arrow points
- Gently twist the tool to press the pin out.
- Once the pin is about halfway out, pull it the rest of the way with your fingers or tweezers.
Reconnecting the Bracelet
- Remove the required number of links from both sides of the clasp for an even fit.
- Reconnect the bracelet and reinsert the pin from the same direction it was removed.
- Place the pin back into the bracelet and use the press pin tool to gently press it into position.
Important: When pressing pins back in, always press from the split head side to ensure a secure and proper fit.
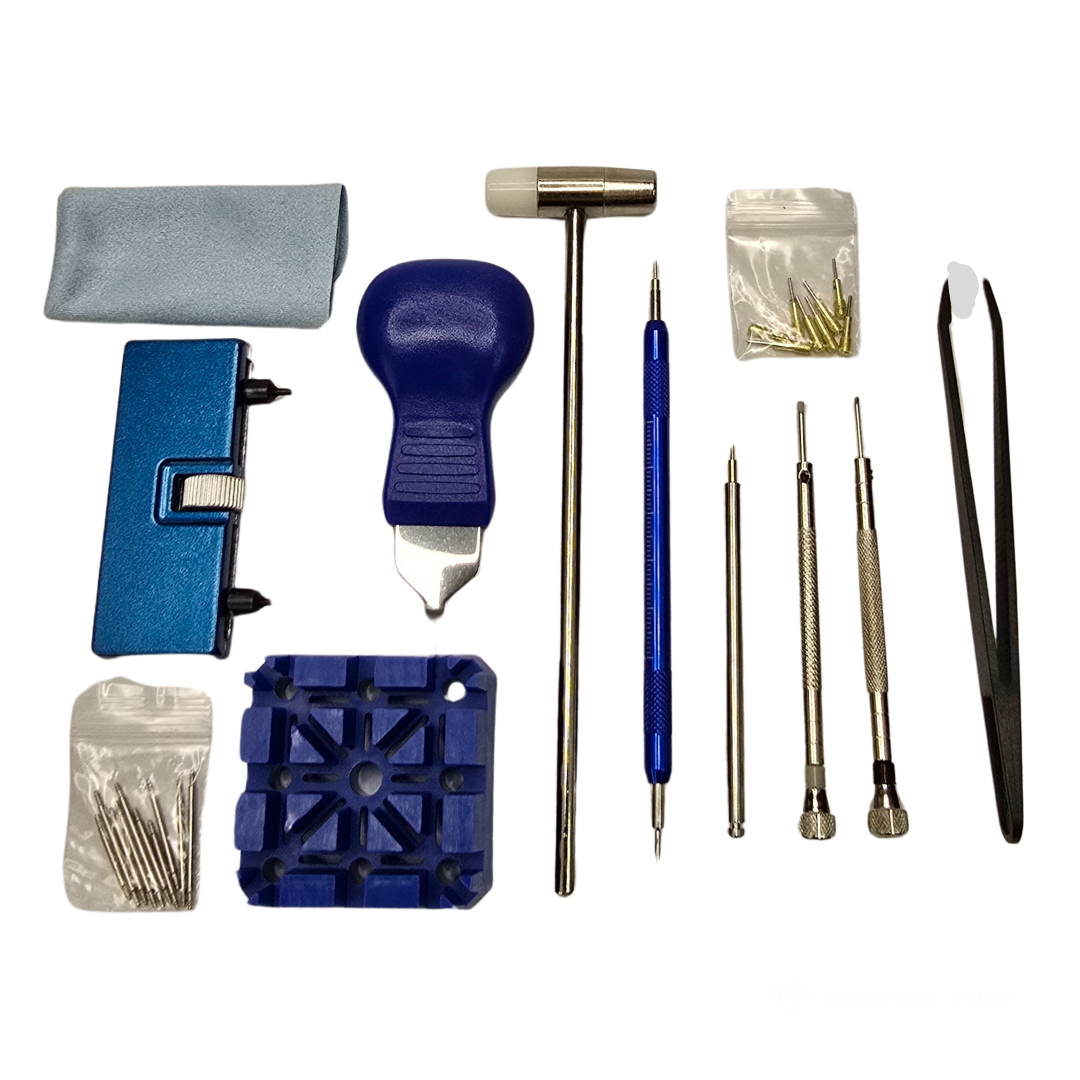
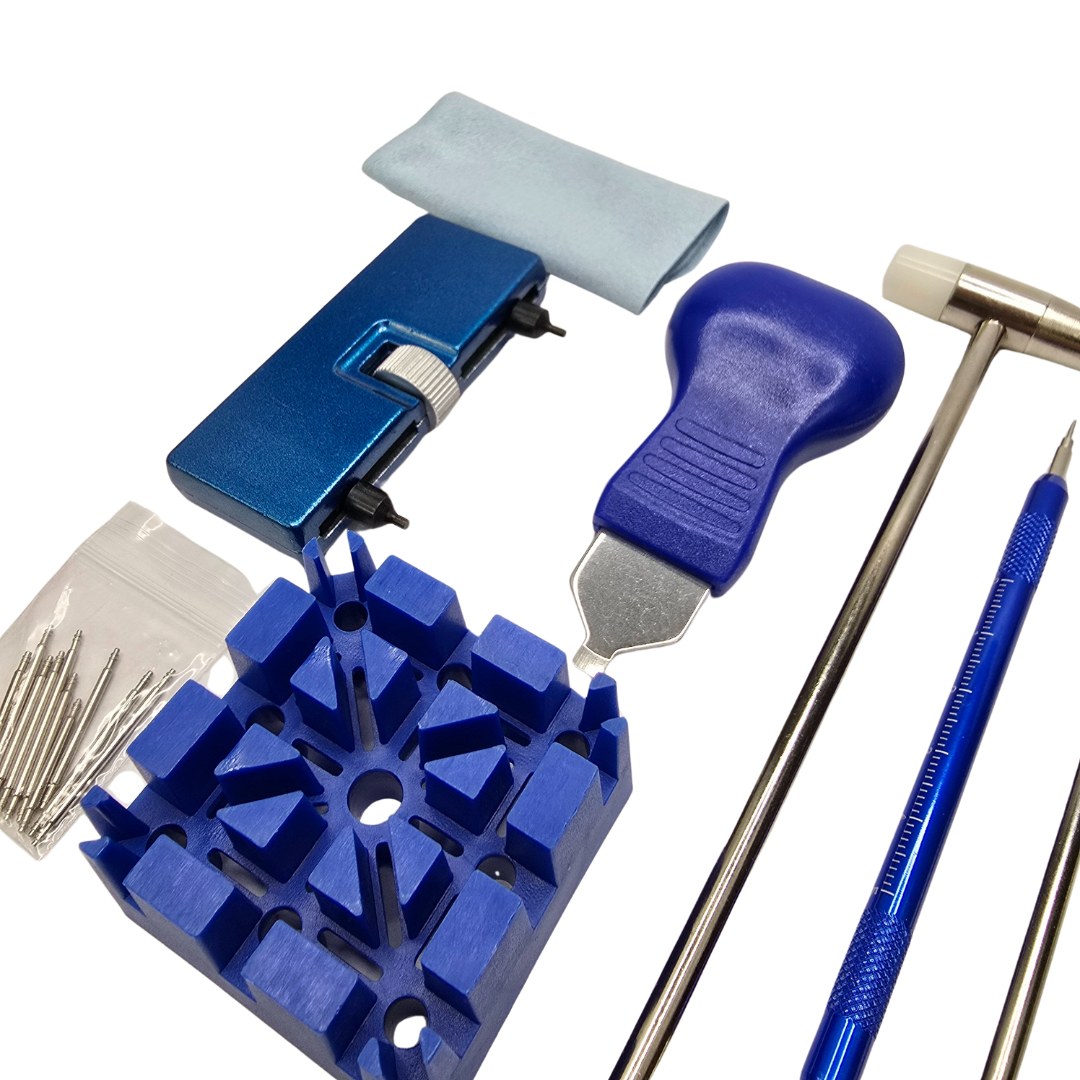
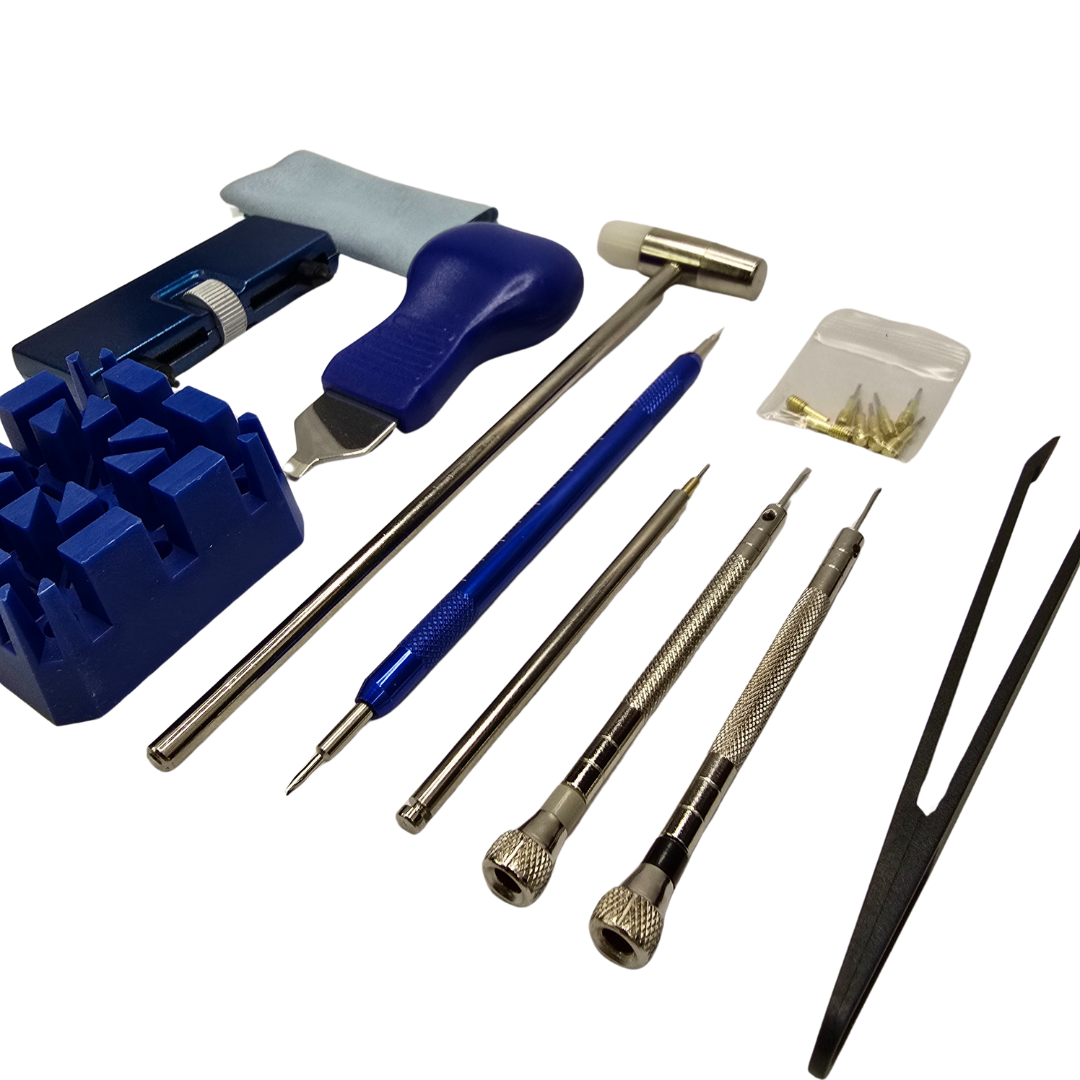
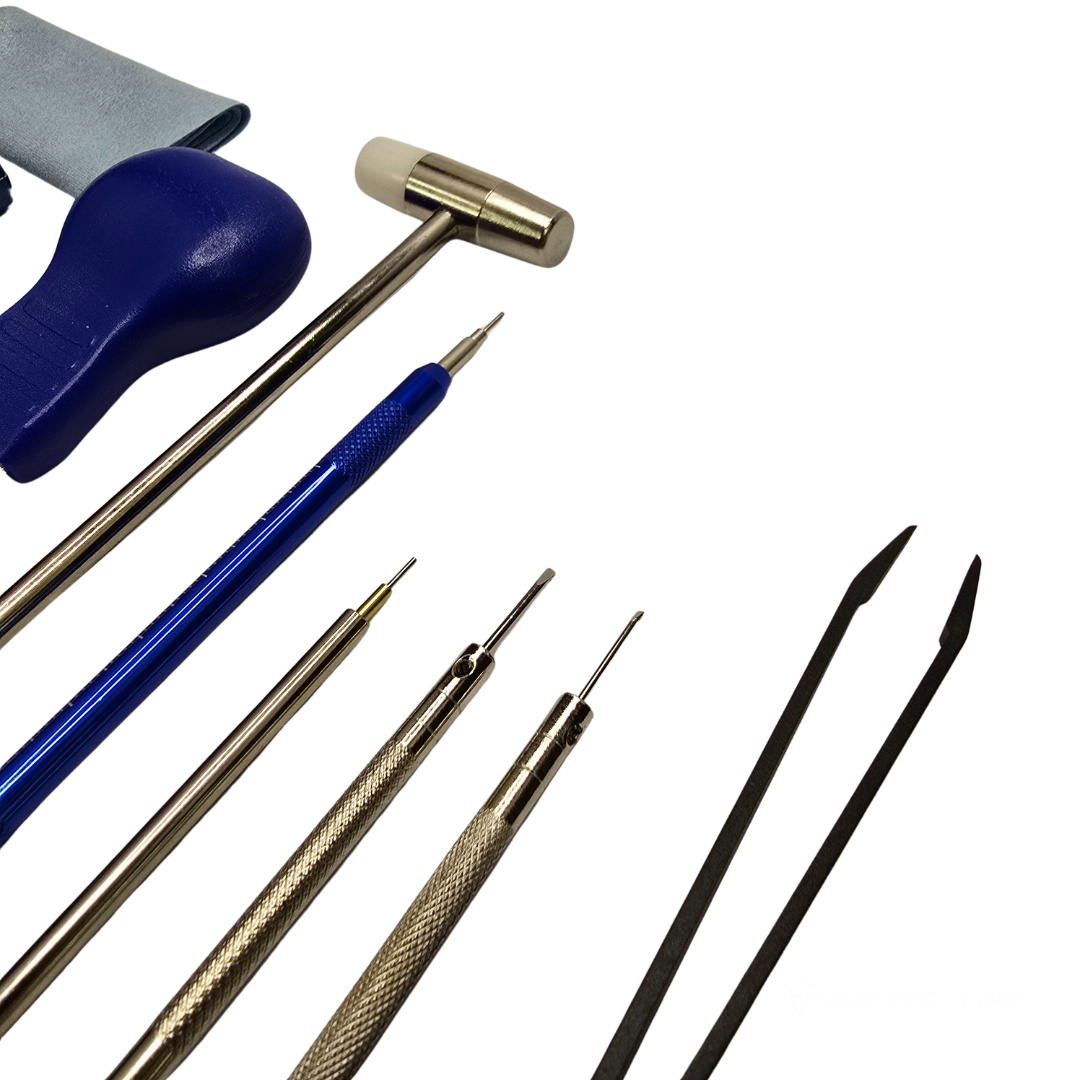
Upgrade Your Setup – 13-Piece Watchmaker Tool Kit
Every Instinct Time watch comes with the essential tools you need to adjust your bracelet — but if you’re looking for extra precision, pro-level ease, or plan to mod your own watches, our 13-piece toolkit is a perfect addition.
Whether you're a beginner watch enthusiast or getting into home modding, this set includes everything to help you size, repair, and personalise your timepieces like a pro.
✅ Great for beginners
✅ Perfect for bracelet adjustments, case opening & basic mods
✅ Designed for ease, durability, and long-term use
Add it to your order and take your watch game to the next level.
instincttime
13-Piece Watch Tool Kit

Let customers speak for us

Received this as a Father’s Day gift, the watch looks and feels like it is worth 10 times the amount. The build quality is fantastic, absolutely love it have had several comments on how good it looks. Can’t wait to purchase my next piece.

Great looking watch, Vincent was easy to deal with.

I recently purchased a custom Seiko Datejust two-tone gold watch with diamond markers and a gold dial, and I couldn’t be happier. The vintage look is clean, sophisticated, and exactly what I was looking for. Vincent was quick to respond, very accommodating, and clearly passionate about his craft. It’s evident that he truly cares about the service he provides, which is rare and commendable. Overall, an excellent experience from start to finish — I’ll definitely be purchasing another watch in the future.

Very happy with the watch. Looks clean and elegant just like the picture. Received my watch within 2 days of ordering. Awesome service, considering a few other watches too. Thanks for the product.

I asked Vincent for a custom styled watch, he absolutely delivered everything and more, he was so accomodating and patient with my questions, the watch looks and feels amazing great quality, would come back here in a heart beat!

Very comfortable to wear, very good for price, people mistake it all the time for the Rolex GMT. Very happy.

From the moment I saw this watch I needed it in my life. I reached out to Vincent and he was beyond helpful, any questions I had he was more than happy to take the time to answer. An absolute pleasure. Now the watch, it’s truly stunning. The pictures don’t capture how good this thing is. The green, so deep and beautiful, the case is incredibly finished, overall exceeded all my expectations. Good weight to it too. Have had many compliments on it as is understandable with how good it looks. Will be buying more from Vincent.

As an avid watch collector and someone quite knowledgeable within the watch community these are outstanding especially in terms of seiko mods. The movement is perfect has a beautiful finish and quiet indistinguishable from the original model. It is paying homage to. Watch has some weight to it, but he still lightweight on par in terms of weight to the real thing. Customer service was exceptional. Vincent is extremely friendly even came with a watch box signed warranty cards and purchase dates and even tools so that I could adjust the sizing myself, paid express shipping and it was here overnight regardless of my distance will never purchase another seiko mod from another dealer, as someone that has previously owned the real thing couldn’t have asked for a better duplicate

Will definitely purchase from these guys again. Received the watch in 3-4 days after I ordered it online. Came with a free kit so I could adjust the size easily as well. Good quality watch, definitely recommend

Professional, detailed and attentive.
Working with Vincent on a custom design has been a pleasure: guiding the process with his knowledge, always promptly and meticulously answering all my questions and constructing a beautiful bespoke final product. 10/10

Very nice watch, close up photos below

I recently purchased a watch from Vincent, and I have to say , the experience was nothing short of excellent. What really stood out to me wasn’t just the quality of the product, but the exceptional customer service that came with it.
From the start, Vincent was incredibly helpful and patient, happily answering every question I had. He didn’t just sell me a watch, he genuinely cared about making sure I was confident and informed in my purchase. He even went out of his way to help me compare other stores and gave me solid advice on how to spot trustworthy sellers in the modding scene. That kind of support is rare, and it made the whole process feel smooth, personal, and enjoyable.
Shipping was lightning-fast. My watch was dispatched the same day I placed the order. It’s clear that Vincent takes a lot of pride in what he does, and it really shows in both his service and how he treats his customers.
Overall, I couldn’t be happier. Vincent has definitely earned my trust, and I wouldn’t hesitate to buy from him again. Highly recommended!

Great value. This watch is exactly what I was after, the quality is fantastic . Vincent has also been very helpful with his advice and quick to reply to my emails. Would buy again!

This was my first purchase from instinct time and all I could say was wow! I ordered the Seitona Black Panda and the amount of detail and craftsmanship is spectacular. You can tell they really love their watches that’s for sure. The watch itself is more and better than what I imagined but the customer service was top tier. I sent an email asking a few questions and got a response back appropriately 4-6 minutes later! Also not to mention the quick delivery time too! I highly recommend Instinct Time

This was my first purchase from instinct time and all I could say was wow! I ordered the Seitona Black Panda and the amount of detail and craftsmanship is spectacular. You can tell they really love their watches that’s for sure.
The watch itself is more and better than what I imagined but the customer service was top tier. I sent an email asking a few questions and got a response back appropriately 4-6 minutes later! Also not to mention the quick delivery time too!
I highly recommend Instinct Time.
Become a Part of Our Thriving Instagram Community!
Join the Instinct Time community and see our watches in action. From custom builds to customer wrist shots — follow us for behind-the-scenes content, new drops, and everyday inspiration. #EverySecondCounts